
Can you get rid of ivy in your yard? Yes, you absolutely can! Getting rid of ivy in your yard is achievable with persistence and the right methods. This guide will walk you through effective strategies for English ivy removal, poison ivy control, and general vine eradication to reclaim your outdoor space. We’ll cover everything from manual ivy removal to using a weed killer for ivy and exploring natural ivy killer options. Plus, we’ll touch on ivy mulching and covering ivy ground to prevent regrowth.
Ivy, while sometimes beautiful, can quickly become a stubborn problem, turning your garden into an impenetrable jungle. Its aggressive growth can choke out other plants, damage structures, and make yard maintenance a nightmare. Dealing with invasive plants like ivy requires a systematic approach. Whether you’re battling a small patch or a vast takeover, these steps will help you regain control.
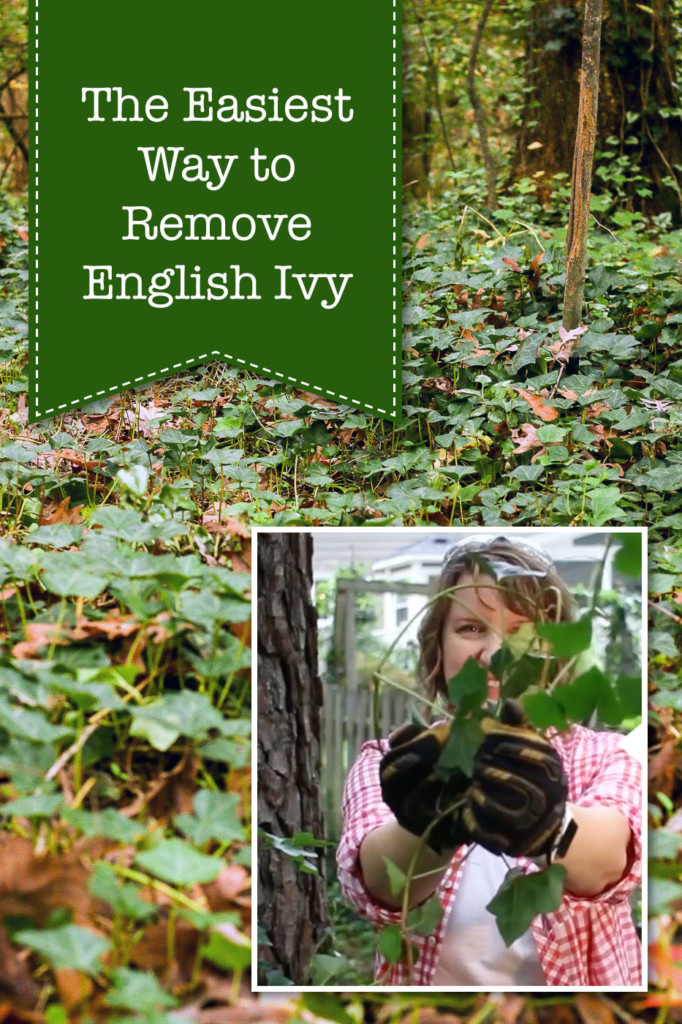
Image Source: prettyhandygirl.com
Why Ivy Needs to Go
Before we dive into the “how,” let’s briefly touch on “why.” Ivy is an invasive plant removal challenge for many reasons:
- Damage to Structures: Ivy roots can penetrate mortar, damage paint, and weaken wooden structures. They cling tenaciously, making removal difficult and potentially costly.
- Outcompeting Native Plants: Ivy casts a dense shade and spreads rapidly, smothering beneficial native plants and reducing biodiversity.
- Habitat for Pests: Thick ivy growth can provide shelter for rodents and insects, potentially leading to infestations.
- Aesthetic Concerns: Overgrown ivy can make a yard look unkempt and neglected.
Tackling the Vine: Your Step-by-Step Guide
Getting rid of ivy is a process, not a one-time event. Be prepared to repeat certain steps and stay vigilant.
Step 1: Identify What You’re Dealing With
This might seem obvious, but it’s crucial. Are you dealing with common English ivy ( Hedera helix), or perhaps the dreaded poison ivy control challenge? They require slightly different approaches, especially regarding safety.
English Ivy
English ivy is characterized by its dark green, lobed leaves. It’s a perennial evergreen that climbs and trails. It can cover large areas quickly.
Poison Ivy
Poison ivy has compound leaves with three leaflets, often with a reddish tint in spring and fall. Poison ivy control requires extreme caution. Never touch it with bare skin. Wear gloves, long sleeves, and pants when dealing with it. Burning poison ivy is also dangerous as the oils can become airborne.
Step 2: The Initial Assault – Cutting Back
The first major step in manual ivy removal is to cut the ivy back significantly. This makes the subsequent steps more manageable.
Cutting the Vines
- Use Sharp Tools: Employ sharp pruning shears, loppers, or even a pruning saw for thicker vines. Dull tools will crush the stems, making it harder to cut and potentially spreading disease.
- Cut at the Base: Locate the main root crowns and cut all vines at the base, about 1-2 inches above the ground. This severs the connection to the roots, starving the above-ground growth.
- Remove Above-Ground Growth: Once the vines are severed at the base, pull and roll up the detached ivy. Dispose of it properly. Do not compost ivy, especially if it has gone to seed, as it can spread. Bag it and put it in your municipal yard waste bin, or take it to a green waste disposal site.
Dealing with Climbing Ivy
For ivy climbing trees or walls:
- Cut at the Base: Again, the most critical step is to cut the main stems at the base of the plant.
- Remove What You Can: After cutting at the base, the ivy on the wall or tree will likely die back. You can then try to pull it off. For walls, be gentle to avoid damaging the surface. For trees, allow the dead ivy to fall naturally or carefully remove it to avoid stressing the tree.
Step 3: Tackling the Roots – The Key to Eradication
Simply cutting the top growth won’t kill the plant. The roots will continue to send up new shoots. This is where persistent vine eradication comes into play.
Method 1: Digging Out the Roots
- Locate the Root Crown: After cutting the vines, you’ll need to find the main root systems. These are usually larger, thicker portions of the plant near the ground level.
- Dig and Pry: Use a garden fork or spade to loosen the soil around the roots. Carefully dig out as much of the root system as possible. Ivy roots can be extensive and deep, so this can be labor-intensive.
- Inspect and Repeat: After initial digging, meticulously inspect the area for any remaining root fragments or new shoots. Remove them immediately.
Method 2: Smothering the Ivy
This method is effective for larger areas and can be a natural ivy killer approach by depriving the plant of light.
- Clear the Area: Mow or cut the ivy down as close to the ground as possible.
- Cover with Opaque Material: Use thick layers of cardboard, several sheets of newspaper, or commercial landscape fabric. Ensure there are no gaps where light can penetrate.
- Add a Layer of Mulch: Top the covering material with a thick layer of mulch (wood chips, bark, compost). This helps hold the covering in place, retains moisture, and looks tidier. This is a form of ivy mulching.
- Weight it Down: Use rocks, bricks, or logs to secure the edges of the covering material.
- Wait and Monitor: Leave the covering in place for at least one growing season, ideally longer. Check periodically for any signs of ivy growth poking through and address them immediately. This method of covering ivy ground is patient but effective.
Method 3: Using a Weed Killer for Ivy
For stubborn infestations or when manual ivy removal is too daunting, a weed killer for ivy can be an option.
- Choose the Right Product: Look for herbicides that are effective against broadleaf evergreens. Glyphosate-based products are often used, but be aware of their non-selective nature. If you want to target ivy specifically and avoid harming other plants, look for selective herbicides or use them with extreme care.
- Application Timing: Apply herbicides when the ivy is actively growing. Avoid windy days to prevent drift onto desirable plants.
- Concentration and Method: Follow the product instructions carefully. For tough vines, you might need to apply the herbicide directly to freshly cut stems (a technique called “cut stump treatment”). This allows the chemical to be absorbed directly into the root system.
- Safety First: Wear protective gear, including gloves, eye protection, and long sleeves. Keep children and pets away from treated areas.
Method 4: Natural Ivy Killer Options
If you prefer to avoid chemical herbicides, several natural ivy killer methods can be employed, often in conjunction with manual removal.
- Vinegar: Horticultural vinegar (20% acetic acid) can be effective. Spray it directly onto the ivy leaves on a sunny day. It’s a contact killer and may require repeat applications. Be cautious, as it can also harm other plants and can be corrosive.
- Boiling Water: Pouring boiling water directly onto the base of the ivy and exposed roots can kill them. This is best for small patches and requires caution to avoid burns.
- Salt: A saltwater solution can desiccute the plant. Mix salt with water and apply to the base. However, salt can sterilize the soil, so use it sparingly and only where you want to kill everything.
Step 4: The Vigilant Phase – Preventing Regrowth
The battle isn’t over once you’ve removed the visible ivy. Ivy is tenacious and will try to regrow from any missed root fragments or seeds.
Continuous Monitoring
- Regular Inspections: Walk through your yard regularly, especially in the spring and summer. Look for any new ivy shoots emerging.
- Immediate Removal: Pull out any new shoots as soon as you see them. The smaller they are, the easier they are to remove, and the less energy they have stored in their roots.
Mulching and Ground Cover
- Ivy Mulching: Once you have cleared an area, consider ivy mulching to suppress any potential regrowth. A thick layer of mulch (3-4 inches) can help.
- Covering Ivy Ground: For areas where ivy was particularly dense, covering ivy ground with a new, desirable ground cover or planting hardy shrubs can help outcompete any returning ivy. Choose plants that will thrive in the conditions where the ivy was growing.
Improving Soil Health
Healthy soil can support robust plant growth, making it harder for invasive species to take hold. Amend your soil with compost after removing ivy to encourage beneficial plants.
Specific Scenarios and Challenges
Let’s consider some common situations you might encounter when dealing with ivy.
Ivy on Trees
- Sever the Base: The most important step is to cut the ivy at the base of the tree.
- Do Not Wrap: Avoid wrapping the severed vines around the tree trunk. This can create a wick for moisture and potentially cause rot.
- Let it Die and Fall: The ivy growing up the trunk will likely die. You can let it fall naturally or carefully pull it off once it’s dry and brittle. Trying to pull live ivy off can damage the tree’s bark.
Ivy on Walls and Fences
- Manual Removal is Key: For these surfaces, manual removal is often best to avoid damage.
- Tools for Loosening: Use a trowel or putty knife to gently loosen the ivy from the mortar or wood.
- Careful Pulling: Pull the ivy away slowly and steadily. For stubborn patches, you might need to snip individual tendrils.
- Post-Removal Treatment: If roots remain embedded, you can carefully scrape them out or apply a targeted herbicide with a small brush.
Poison Ivy Control: A Special Case
Remember, poison ivy control requires extra precautions.
- Personal Protective Equipment (PPE): Always wear thick, impermeable gloves, long sleeves, long pants, closed shoes, and eye protection.
- Wash Everything: After working with poison ivy, wash your clothes, tools, and shoes thoroughly. Use soap and water. Urushiol (the oil that causes the rash) can remain active on surfaces for a long time.
- Dispose of Materials Safely: Bag all removed poison ivy and dispose of it in sealed bags. Do not burn it.
Using a Weed Killer for Ivy Safely
When using a weed killer for ivy, safety and environmental impact are paramount.
- Read the Label: Always read and follow the instructions on the herbicide label precisely.
- Targeted Application: Use a sprayer with a shield or a brush to apply the herbicide only to the ivy.
- Environmental Considerations: Choose products that are less persistent in the soil if possible. Be mindful of nearby water sources.
Tools of the Trade: What You’ll Need
- Sharp Pruning Shears: For cutting smaller vines.
- Loppers: For thicker vines.
- Pruning Saw: For very thick, woody stems.
- Garden Fork or Spade: For digging out roots.
- Sturdy Gloves: Essential for protection, especially if dealing with poison ivy.
- Eye Protection: Safety glasses or goggles.
- Long-Sleeved Shirts and Pants: For skin protection.
- Heavy-Duty Yard Bags: For disposal.
- Wheelbarrow: For moving debris.
- Herbicides (Optional): If you choose this route, select appropriate products.
- Landscape Fabric or Cardboard: For smothering larger areas.
- Mulch: For covering and suppressing growth.
Table: Ivy Removal Methods at a Glance
| Method | Best For | Pros | Cons |
|---|---|---|---|
| Manual Ivy Removal | Small to medium infestations, sensitive areas | Non-toxic, precise control, immediate results | Labor-intensive, may miss roots, requires persistence |
| Digging Out Roots | Stubborn roots, smaller patches | Kills plant at the source, relatively immediate | Physically demanding, can be difficult in hard soil, can miss roots |
| Smothering (Covering) | Large areas, long-term solution | Natural, effective, reduces need for chemicals, suppresses weeds | Takes time (months to a year+), can look unsightly initially |
| Chemical Herbicides | Severe infestations, difficult-to-reach areas | Fast-acting, can be effective on deep roots | Environmental impact, potential harm to non-target plants, toxicity |
| Natural Ivy Killer | Small patches, eco-conscious gardeners | Non-toxic alternatives, environmentally friendly | Often requires repeat applications, can be less potent |
| Cut Stump Treatment | Thick, established vines, immediate root kill | Highly effective for killing roots, targeted application | Requires fresh cuts, need for herbicide, safety precautions |
Frequently Asked Questions (FAQ)
Q1: How quickly does ivy grow?
A1: Ivy can grow quite rapidly, often several feet per year, depending on the species and growing conditions.
Q2: Can I use boiling water to kill ivy permanently?
A2: Boiling water can kill the parts of the ivy it contacts, but it may not reach deep roots. Repeat applications might be necessary for complete eradication.
Q3: What’s the best time of year to remove ivy?
A3: Late spring or early summer is often ideal, as the plant is actively growing, making it more susceptible to removal methods, including herbicides if used. However, you can tackle it year-round.
Q4: How do I dispose of ivy safely?
A4: Bag all removed ivy tightly and dispose of it in your municipal yard waste. Avoid composting it, especially if it has flowered or seeded, as it can spread.
Q5: My neighbor’s ivy is creeping into my yard. What can I do?
A5: You can politely speak to your neighbor about the issue. In the meantime, focus on removing the ivy that is within your property boundaries. You may need to establish a barrier or regularly remove encroaching vines.
Q6: Is there a natural weed killer for ivy that really works?
A6: Natural options like horticultural vinegar and boiling water can be effective, especially when used consistently on actively growing plants. For more stubborn infestations, they might need to be combined with manual removal.
Q7: How do I prevent ivy from coming back after removal?
A7: Consistent monitoring and immediate removal of any new shoots are crucial. Consider planting dense ground cover or using mulch to suppress new growth.
By following these detailed steps, you can effectively tackle English ivy removal, implement poison ivy control measures safely, and achieve overall vine eradication. Remember that persistence is key to controlling climbing plants like ivy and restoring the health and beauty of your yard.