
Can you replace a lawn mower throttle cable yourself? Yes, you absolutely can replace a lawn mower throttle cable yourself with basic tools and a bit of patience. This guide will walk you through the entire process, from identifying the problem to getting your mower running smoothly again. A faulty throttle cable can lead to erratic engine speeds, making mowing a frustrating and inefficient task. Fortunately, it’s a common issue with a straightforward solution.
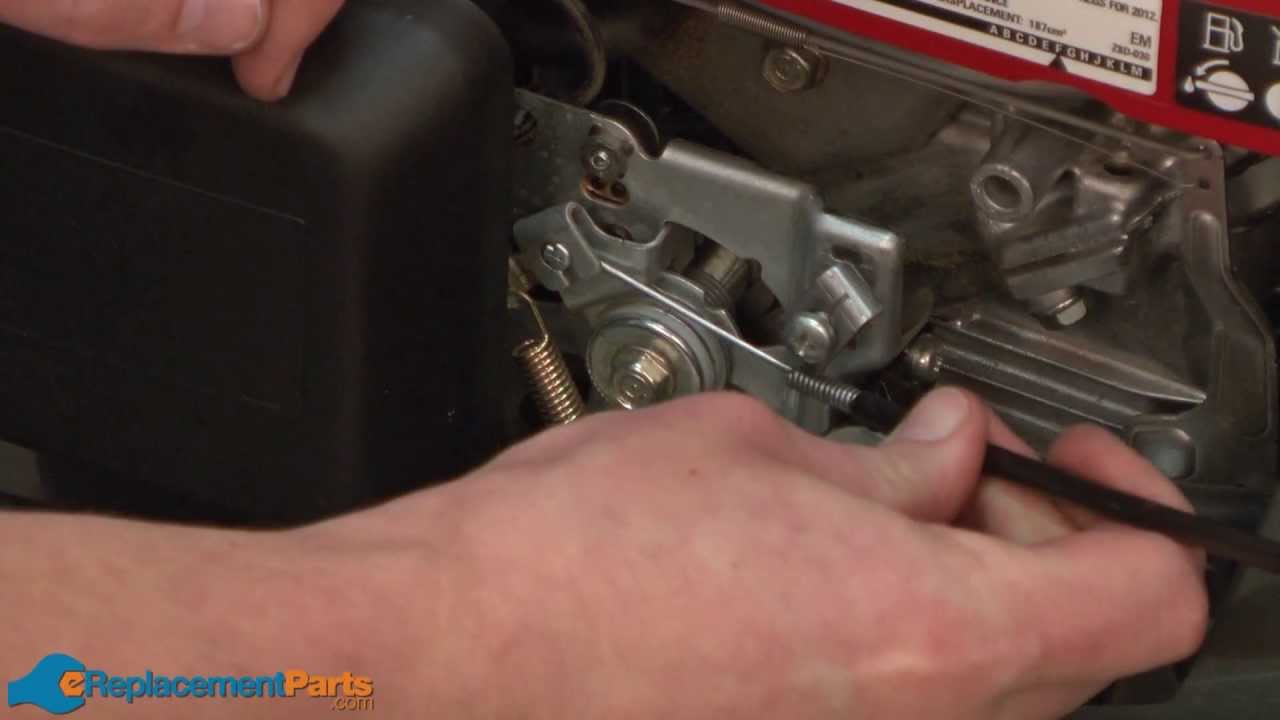
Image Source: i.ytimg.com
Why Your Lawn Mower Needs a Working Throttle Cable
The throttle cable is the unsung hero of your lawn mower’s performance. It connects the throttle control on your handle to the carburetor, dictating how much fuel and air mixture enters the engine. This directly influences the engine’s speed, or RPMs. When this cable is damaged, frayed, or disconnected, you’ll likely notice:
- Inconsistent Engine Speed: The engine might surge or bog down, regardless of your setting.
- Inability to Reach Full Throttle: You can’t get the engine to speed up for tougher grass.
- Engine Won’t Start or Stalls: If the throttle is stuck in a closed position, it can prevent the engine from starting or cause it to stall easily.
- Loose or Inoperative Throttle Control: The lever or knob on your handle feels floppy or doesn’t change the engine speed at all.
These symptoms are often linked to issues with the lawn mower throttle cable. A worn or broken cable can significantly impact your ability to control the mower effectively.
Tools You’ll Need for the Job
Gathering the right tools before you start will make the process much smoother. Most of these are standard items found in any home toolbox.
- Screwdrivers: Both Phillips head and flathead screwdrivers will be necessary for removing various panels and components.
- Wrenches and Socket Set: You’ll likely need a few common sizes of open-end wrenches or a socket set to loosen nuts and bolts.
- Pliers: Needle-nose pliers are particularly useful for gripping and manipulating small parts, like the cable end.
- Wire Cutter or Heavy-Duty Scissors: To cut zip ties or trim excess cable housing if needed.
- Gloves: To keep your hands clean and protect them from sharp edges.
- Safety Glasses: Always wear eye protection when working on machinery.
- New Throttle Cable: Ensure you have the correct replacement cable for your specific lawn mower model.
- Optional: Zip Ties: To neatly secure the new cable once it’s in place.
- Optional: Penetrating Oil (like WD-40): For loosening stubborn bolts or rusted components.
Locating the Problem: Common Throttle Cable Issues
Before you can replace mower cable, you need to confirm it’s the culprit. A visual inspection is the first step.
- Start at the Handle: Follow the throttle cable from the lawn mower throttle control lever or knob down towards the engine. Look for any obvious damage.
- Fraying: The outer casing might be split, exposing inner wires.
- Kinks or Bends: Sharp bends can restrict cable movement.
- Snapping: The cable might be completely broken.
- Inspect the Engine End: Trace the cable to where it connects to the carburetor.
- Disconnecting: The cable end might have popped off the linkage.
- Corrosion: Rust or dirt can seize up the mechanism.
- Broken Housing: The outer sleeve might be damaged at the connection point.
- Check the Cable Housing: Ensure the plastic or metal housing that protects the inner cable is intact and not pinched. A pinched housing can prevent the cable from moving freely, mimicking a broken cable.
Step-by-Step Guide to Replacing Your Lawn Mower Throttle Cable
Now that you’ve confirmed the need for a throttle cable repair, let’s get to work.
Step 1: Safety First!
- Disconnect the Spark Plug: This is the most crucial safety step. Pull the spark plug wire off the spark plug to prevent the engine from accidentally starting while you’re working on it.
- Let the Mower Cool: If you’ve recently used the mower, allow the engine and exhaust components to cool down completely.
Step 2: Accessing the Throttle Cable
You’ll need to gain access to both ends of the throttle cable. This usually involves removing some plastic shrouding or panels.
- Handle Assembly: Look for screws or clips securing the handle assembly where the lawn mower speed control is located. Carefully remove these to expose the throttle lever and the cable’s entry point.
- Engine Bay: The other end of the cable connects to the carburetor and governor linkage. You might need to remove the engine cover or side panel to get a clear view of this area. Refer to your mower’s manual if you’re unsure about panel removal.
Step 3: Detaching the Old Throttle Cable
Once you have access, it’s time to disconnect the old cable.
- At the Handle:
- The cable usually has a barrel-shaped end that sits in a slot on the throttle lever.
- You might need to loosen a small clamp or nut holding the cable housing in place.
- Carefully wiggle the barrel end out of its slot. The cable will then be free from the handle assembly.
- At the Carburetor/Linkage:
- This is where the mower throttle linkage comes into play. The cable end typically has a small metal piece (often a “z-bend” or a threaded stud with a clip) that attaches to a lever on the carburetor or the governor arm.
- Use pliers to carefully detach this end. Sometimes, there’s a small spring that needs to be released first.
- Note how it’s attached. You might want to take a photo for reference.
- Release any cable clips or retainers that hold the cable housing along its path. These are often plastic clips screwed or snapped into the mower’s frame.
Step 4: Routing the New Throttle Cable
This is often the trickiest part. You need to guide the new cable from the handle to the carburetor, ensuring it follows the same path as the old one.
- Using the Old Cable as a Guide (Optional but Recommended): Some people tie a piece of string or thin wire to the end of the old cable before pulling it out. Once the old cable is completely removed, tie the new cable to the string and pull it back through the mower’s frame. This ensures the new cable follows the exact route, avoiding kinks and snags.
- Manual Routing: If you don’t use the string method, carefully feed the new cable, paying close attention to where the old one was routed.
- Make sure the cable housing isn’t pinched or rubbing against any moving parts or sharp edges.
- Ensure the cable can move freely without restriction.
- Secure the cable housing with the original clips or new zip ties as you go.
Step 5: Connecting the New Throttle Cable
Now, attach the new cable at both ends.
- At the Carburetor/Linkage:
- Align the end of the new cable with the correct attachment point on the carburetor or governor arm.
- Reconnect it securely, mimicking how the old one was attached. Pay attention to any springs involved in the mower speed cable system.
- Ensure the mower throttle spring (if present and connected to the throttle linkage) is correctly positioned and not tangled.
- At the Handle:
- Thread the cable end into its slot on the throttle lever.
- If there was a clamp, re-tighten it to hold the cable housing securely, but not so tight that it restricts cable movement.
Step 6: Adjusting the Throttle Cable
Proper adjustment is key to ensuring your lawn mower speed control works correctly.
- Initial Setting: With the engine off and the spark plug wire still disconnected, move the throttle control lever on the handle.
- When the throttle lever is at its slowest setting (idle), the throttle plate on the carburetor should be almost closed.
- When the throttle lever is at its fastest setting (full throttle), the throttle plate on the carburetor should be fully open.
- Fine-Tuning: Most throttle cables have an adjuster. This might be a barrel adjuster near the carburetor or the handle, or a simple nut that locks the cable housing in place.
- Too Loose: If the engine doesn’t reach full speed, the cable needs to be tightened. Turn the adjuster to pull the cable tauter, or loosen the housing clamp and slide the housing forward slightly.
- Too Tight: If the engine idles too high or the throttle plate is always slightly open, the cable needs to be loosened. Turn the adjuster the other way, or loosen the housing clamp and slide the housing back slightly.
- Test the Range of Motion: Move the throttle lever through its entire range. The cable should move smoothly without binding, and the throttle plate on the carburetor should respond accordingly.
A mower throttle diagram can be incredibly helpful here to visualize how the linkage and springs work together.
Step 7: Reassembly and Testing
- Reassemble Panels: Once you’re satisfied with the cable’s function and adjustment, reattach any panels or covers you removed.
- Reconnect Spark Plug: Reconnect the spark plug wire.
- Start the Engine: Start the mower’s engine.
- Test the Throttle: Gently move the throttle control lever. The engine speed should respond smoothly and predictably.
- Check that it idles correctly and can accelerate to full speed.
- Listen for any unusual noises or erratic behavior.
Troubleshooting Common Issues After Replacement
If your mower isn’t running perfectly after replacing the cable, don’t despair. Here are a few common problems and their solutions:
- Engine Still Idles Too High or Too Low:
- Cause: Improper adjustment of the throttle cable.
- Solution: Revisit Step 6. Slightly adjust the cable tension using the adjuster or housing clamp. Ensure the throttle plate on the carburetor is fully closed at idle and fully open at maximum throttle.
- Throttle Lever Feels Loose or Stiff:
- Cause: Cable housing is pinched, or the new cable is routed incorrectly.
- Solution: Inspect the cable’s path. Make sure the housing isn’t snagged or crushed. Loosen any zip ties and re-route if necessary. Check the connection points at both ends for freedom of movement.
- Throttle Lever Doesn’t Move the Linkage:
- Cause: The cable end is not properly attached to the carburetor linkage, or the linkage itself is stuck.
- Solution: Double-check that the cable end is securely fastened. If the linkage on the carburetor is stiff, it might need cleaning or lubrication. Ensure the mower throttle spring is correctly installed and providing tension.
- Cable Broke Again Quickly:
- Cause: The cable is routed over a sharp edge or is being pinched somewhere.
- Solution: Carefully re-examine the entire cable path. You may need to add some protective material (like rubber grommets or tape) where the cable might rub.
When to Call a Professional
While most throttle cable repair jobs are manageable for DIYers, there are times when it’s best to seek professional help.
- Uncertainty about the Problem: If you’re unsure whether the throttle cable is the issue or if you’ve tried replacing it and still have problems.
- Complex Linkage Systems: Some mowers have very intricate governor linkages or lawn mower throttle assembly designs that can be difficult to navigate.
- Lack of Proper Tools: If you don’t have the necessary tools or the physical ability to perform the repair.
- Safety Concerns: If you’re uncomfortable working with the mower’s engine components or electrical system.
Understanding Your Mower’s Throttle System: Key Components
To perform the replacement effectively, it helps to know the main parts involved:
| Component | Description | Function in Throttle Control |
|---|---|---|
| Throttle Cable | A flexible cable with inner wire and outer housing, connecting the control to the engine. | Transmits motion from the control lever to the carburetor. |
| Throttle Control | Lever or knob on the handle. | User input to set engine speed. |
| Carburetor Linkage | Metal arm or rod on the carburetor that the throttle cable attaches to. | Opens or closes the throttle plate within the carburetor. |
| Throttle Plate | A butterfly valve inside the carburetor that regulates airflow and fuel mixture. | Directly controls the amount of air entering the engine. |
| Governor | A mechanical or electronic system that maintains engine speed under varying loads. | Interacts with the throttle linkage to prevent over-speeding or stalling. |
| Mower Throttle Spring | Spring that provides tension to the throttle linkage, helping it return to idle or reach full throttle. | Ensures the throttle mechanism moves smoothly and returns correctly. |
Knowing these components and how they interact is key to successful throttle cable repair. A good lawn mower throttle cable diagram for your specific model can be invaluable.
Maintaining Your Lawn Mower’s Throttle System
Once you’ve replaced the cable, a little preventative maintenance can extend its life and keep your mower running smoothly.
- Regular Cleaning: Keep the area around the carburetor and throttle linkage clean. Dust and debris can impede movement.
- Inspect Cables Periodically: Before each mowing season, give the throttle cable a quick visual inspection for any signs of wear or damage.
- Lubrication: A very small amount of light oil on the cable ends and linkage points can help prevent seizing. Use this sparingly to avoid attracting dirt.
- Proper Storage: Store your mower in a dry place. Moisture can lead to corrosion on metal parts, including the throttle linkage.
Replacing a faulty mower speed cable is a rewarding DIY task that can save you money and get your lawn mower back in prime operating condition. By following these steps carefully, you can ensure your lawn mower throttle control works as intended, providing you with efficient and reliable lawn care.
Frequently Asked Questions (FAQ)
Q1: How do I know if my lawn mower throttle cable is bad?
A1: Symptoms of a bad throttle cable include inconsistent engine speed, the inability to reach full throttle, the engine stalling easily, or a loose/inoperative throttle control lever on the handle. A visual inspection for fraying, kinks, or breaks in the cable or its housing is also a good indicator.
Q2: Can I use a generic throttle cable for my lawn mower?
A2: While some generic cables might fit, it’s always best to use the specific replacement cable recommended for your lawn mower model. This ensures proper length, cable end types, and housing compatibility for optimal performance and longevity.
Q3: My new throttle cable is too long or too short. What can I do?
A3: If the cable is too long, you may need to reroute it carefully to minimize slack, or ensure all cable clips are used to hold it in its proper position. If it’s too short, you might have routed it incorrectly, or you may need to order the correct length. Ensure you followed the original path precisely.
Q4: What does the governor do in relation to the throttle cable?
A4: The governor works in conjunction with the throttle cable and linkage to maintain a consistent engine speed. When the engine speeds up or slows down beyond the set point, the governor adjusts the throttle plate (via the linkage connected to the cable) to correct the speed. A properly functioning mower throttle linkage and governor system ensures your mower doesn’t over-rev or bog down.
Q5: How often should I inspect my lawn mower’s throttle cable?
A5: It’s a good practice to inspect your throttle cable at least once a year, typically before the start of the mowing season. Look for any signs of wear, damage, or stiffness in the cable’s movement.
Q6: My mower has a throttle assembly with multiple cables. Is it harder to replace?
A6: Mowers with more complex lawn mower throttle assembly designs, especially those with cruise control or multiple speed settings, can be more challenging. It’s crucial to get a good mower throttle cable diagram for these systems and to meticulously document how each cable is routed and connected before removal. If you’re unsure, professional help is recommended.
Q7: Is it normal for the throttle cable to feel a bit stiff at first?
A7: A new cable might feel slightly stiffer initially as the internal lubrication distributes. However, it should still move smoothly without binding. If it feels significantly stiff or requires excessive force to operate, re-check the routing and connections for any pinching or obstructions. Ensure the mower speed cable isn’t rubbing against anything.