
What are garden rows and why use them? Garden rows are long, narrow strips of land prepared for planting seeds or seedlings. They are a fundamental technique in row gardening, offering a structured approach to planting that makes it easier to manage, weed, water, and harvest your crops. This guide will walk you through making rows in your garden, step-by-step, ensuring a successful growing season.
Creating rows in your garden is a simple yet effective way to organize your planting. Whether you’re planting vegetables or flowers, rows provide a clear structure for your garden layout. This method is particularly useful for larger gardens or when you want to maximize your growing space. It’s a time-tested technique that simplifies many gardening tasks.
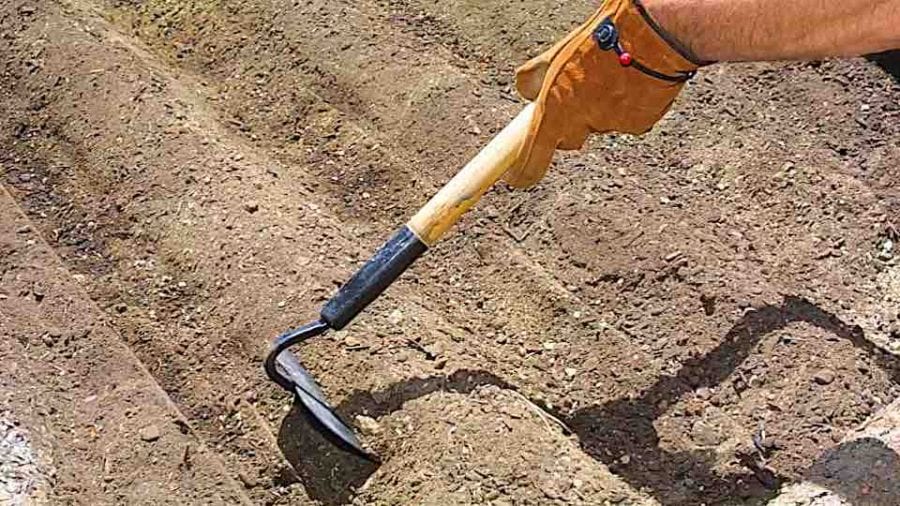
Image Source: grownbyyou.com
Why Rows Work: The Benefits of Row Gardening
Row gardening has been a cornerstone of agriculture for centuries, and for good reason. It brings order and efficiency to the often chaotic process of growing food.
Efficiency in Planting and Maintenance
- Easier Access: Rows create clear pathways between your plants. This means you can easily reach each plant for watering, weeding, and harvesting without stepping on the soil or damaging nearby plants.
- Streamlined Weeding: With plants in neat lines, it’s much simpler to identify and remove weeds. You can hoe or pull weeds between the rows, keeping your crop area clean.
- Targeted Watering: Watering directly at the base of each plant in a row is more efficient. It reduces water waste through evaporation and ensures that water reaches the roots where it’s needed most.
- Simplified Harvesting: Knowing where each crop is planted makes harvesting straightforward. You can simply follow the rows, picking ripe produce as you go.
Space Optimization
- Maximizing Yield: By planting in rows with appropriate planting spacing, you can fit more plants into your garden area, leading to a higher yield from a given space.
- Crop Rotation: Rows make it easier to track which crops were planted where, which is crucial for effective crop rotation. This practice helps prevent soil depletion and reduces pest and disease build-up.
Soil Management
- Tilling and Cultivation: Row gardening facilitates garden tilling, which is the process of loosening the soil. This is often done along the rows to prepare the seedbed and improve aeration and drainage.
- Drainage: Rows can be slightly mounded, creating raised garden beds or simply improving drainage by directing water flow away from the plant roots.
Preparing Your Garden for Rows
Before you can lay out your rows, you need to prepare the ground. This involves clearing the area and getting the soil ready.
Clearing the Area
- Remove Debris: Start by clearing the chosen garden area of any rocks, sticks, weeds, or old plant debris. A clean slate is essential for neat rows.
- Edge the Garden: If you’re creating a new garden space, consider defining the edges. This could be with a simple spade cut or by installing edging materials. This helps keep grass and weeds from encroaching on your planting area.
Preparing Garden Soil
Good soil is the foundation of a healthy garden. Preparing garden soil for rows involves enriching it and making it easy for roots to grow.
- Loosen the Soil: Use a shovel or a tiller for larger areas to loosen the soil. This process, often called garden tilling, breaks up compacted earth, allowing for better root penetration and water infiltration. Aim to turn the soil to a depth of at least 6-8 inches.
- Amend the Soil: Mix in compost, aged manure, or other organic matter. This improves soil structure, fertility, and water retention. Spread a layer of organic matter over the area and then till it into the loosened soil.
- Level the Surface: Once tilled and amended, rake the soil smooth. This creates a level surface that’s perfect for marking out your rows.
Making the Rows: Step-by-Step
Now that your soil is prepared, it’s time to create your planting rows. The method you use will depend on the tools you have and the size of your garden.
Tools You Might Need
- Garden Hoe: Essential for marking and shaping rows.
- Rake: For leveling and smoothing the soil.
- Measuring Tape or String and Stakes: For precise row placement.
- Trowel or Dibber: For planting seeds or seedlings in the rows.
- Rototiller or Garden Fork: For initial soil preparation.
Methods for Creating Rows
Method 1: The Simple Hoe Method
This is the most basic and common way to make rows, perfect for smaller gardens.
- Mark Your First Row: Decide on the direction of your rows. Generally, rows are oriented north to south to ensure even sun exposure for most plants. Use the edge of your hoe to draw a straight line in the soil. This line will be the center of your first row.
- Create a Furrow: With the hoe, draw soil towards the center of the line you just made. This creates a shallow trench, or furrow, where you will plant your seeds. The depth of the furrow will depend on the type of seed you are planting (check seed packets for recommendations).
- Form the Next Row: Move over a suitable distance (this is where planting spacing comes in; consider the mature size of your plants). Use your hoe to draw another line, then pull soil towards the center of this new line to create a second furrow. The space between the two furrows becomes your pathway.
- Continue Across the Garden: Repeat this process, maintaining consistent spacing between the rows, until your garden area is filled with rows.
- Smooth and Level: Once all your furrows are made, use your rake to gently smooth the sides of the furrows and the pathways. This helps create a tidy appearance and removes any large clumps of soil.
Method 2: Using String and Stakes for Precision
For a more precise and visually appealing garden layout, especially for larger areas or when strict alignment is desired, use string and stakes.
- Set Up Stakes: Drive stakes into the ground at the beginning and end of where your first row will be. Make sure they are firmly planted and aligned as straight as possible.
- Attach String: Tie a piece of garden string tautly between the two stakes. This creates a perfect straight line to guide your row creation.
- Mark with the Hoe: Use the hoe to draw a line along the string, creating a slight indentation to mark your row.
- Measure for the Next Row: Measure the desired distance from the string line. This distance should accommodate your pathways and the width of your hoe or cultivating tools. For example, if your plants need 2 feet between rows and your hoe is 6 inches wide, you’d measure 2 feet 6 inches from your first line to set up your next stakes.
- Set New Stakes: Drive two more stakes at this measured distance, ensuring they are parallel to the first set.
- Attach New String: Tie a new string between these stakes.
- Create Furrows: Now, use your hoe to draw soil from the pathways towards the string lines, creating your furrows. Work from one end of the garden to the other.
- Remove Strings and Stakes: Once all rows are marked, carefully remove the strings and stakes.
- Smooth: Rake the soil smooth as in Method 1.
Creating Raised Rows (Optional but Recommended)
For better drainage, aeration, and warmer soil earlier in the season, consider creating slightly raised rows or raised garden beds.
- Mounding the Soil: After creating your furrows with the hoe, use the soil you’ve moved to gently mound the sides of the furrow. This creates a raised planting bed.
- Width of Raised Rows: Aim for rows that are about 6-12 inches wide. The height can be just a few inches above the pathway.
- Trench Planting: Some gardeners prefer to create a deeper trench for planting larger crops like corn or beans. You can then backfill around the plants as they grow.
Planting in Your Garden Rows
Once your rows are ready, it’s time to plant! The spacing of your seeds or seedlings is critical for healthy growth and a good harvest.
Seed Packet Instructions are Key
Always consult the seed packet for specific planting spacing recommendations. This information will tell you:
- Seed Depth: How deep to plant each seed.
- Within-Row Spacing: How far apart to plant seeds or seedlings in the same row.
- Between-Row Spacing: How far apart your rows should be.
Planting Techniques
- Direct Sowing: For most seeds, you’ll create a shallow furrow (as described above) and sprinkle seeds along the bottom at the recommended spacing. Then, gently cover them with soil and lightly firm it down.
- Transplanting Seedlings: If you’re planting seedlings, dig a hole in the row at the correct spacing. Carefully remove the seedling from its container, place it in the hole, and backfill with soil, gently firming it around the base. Water thoroughly after transplanting.
- Seed Tape: For very small seeds like carrots or lettuce, you can use seed tape. This is a biodegradable tape with seeds already spaced correctly. You lay the tape in the furrow, cover it with soil, and water.
Considerations for Your Garden Layout
When planning your rows, several factors will influence your garden layout and the spacing you choose.
Plant Needs
- Sunlight: Most vegetables need at least 6-8 hours of sunlight per day. Orienting rows north to south helps ensure all plants receive adequate light. Taller plants should be placed on the north side of the garden so they don’t shade shorter ones.
- Growth Habit: Consider how large plants will get. Root vegetables like carrots and radishes can be planted closer together, while sprawling plants like squash or cucumbers will need more space.
- Watering Needs: Some plants require more water than others. Grouping plants with similar watering needs can make irrigation more efficient.
Your Garden Space
- Size and Shape: The dimensions of your garden will dictate how many rows you can fit and how long they should be.
- Paths: Ensure your pathways are wide enough to comfortably walk, weed, and harvest. A minimum of 18-24 inches is generally recommended.
Crop Rotation
- Planning for Next Year: When designing your garden layout, think about crop rotation. Avoid planting the same family of vegetables in the same spot year after year. Rows make it easier to track where different crops were grown.
Types of Rows and Garden Beds
While traditional rows are simple furrows, the concept can be adapted for different gardening styles.
Traditional Rows
These are the classic furrows dug directly into the ground. They are easy to create and maintain, suitable for most garden soil types.
Raised Garden Beds
These are structures built above ground level, filled with soil. Raised garden beds offer excellent drainage, warmer soil, and can be easier on your back. Rows can still be made within raised beds, though they might be shorter and wider. The construction of raised garden beds can involve wood, stone, or other materials.
Hill Planting
Sometimes, instead of a single row, seeds are planted in small mounds called hills. This is common for plants like squash, cucumbers, and corn, which benefit from good drainage and air circulation around their base. Each hill can be considered a mini-row for that plant family.
Common Row Gardening Mistakes to Avoid
Even with a simple guide, it’s possible to make a few missteps. Here are some common errors and how to prevent them.
- Rows Too Close Together: This leads to overcrowding, reduced airflow, increased disease risk, and smaller yields. Always check planting spacing guidelines.
- Rows Too Far Apart: This wastes valuable garden space and can lead to more weeds in unused areas.
- Uneven Rows: Crooked rows can make maintenance difficult and look messy. Use stakes and string for precision if needed.
- Poor Soil Preparation: Planting in compacted, un-amended soil will result in stunted growth. Invest time in preparing garden soil and garden tilling.
- Ignoring Plant Needs: Planting sun-loving plants in shady spots or giving sprawling plants too little space will lead to disappointment. Research your plants!
Maintaining Your Rows
Once your plants are in the ground, ongoing care is essential.
Weeding
- Early and Often: Weed regularly, especially when plants are young. It’s easiest to pull small weeds before they compete with your crops for nutrients and water.
- Hoeing: Use a hoe to gently cultivate the soil between rows. This removes small weeds and loosens the top layer of soil, which helps retain moisture. Be careful not to disturb plant roots.
Watering
- Deep Watering: Water deeply and less frequently rather than shallowly every day. This encourages roots to grow deeper into the soil.
- Water the Base: Aim water directly at the base of the plants to prevent fungal diseases on leaves. Soaker hoses or drip irrigation systems are ideal for row gardens.
Mulching
- Benefits: Applying a layer of mulch (straw, wood chips, compost) around your plants helps retain soil moisture, suppress weeds, and regulate soil temperature.
- Application: Apply mulch in a band along the rows, leaving a small gap around the base of the plants to prevent rot.
Fertilizing
- Replenishing Nutrients: As plants grow, they use up nutrients in the soil. You may need to fertilize periodically, especially if your soil is not particularly rich.
- Organic Options: Compost tea, aged manure, or balanced organic fertilizers can be applied as needed, following product instructions.
Adapting Row Gardening for Different Scales
The principles of row gardening are scalable, from a small backyard patch to a larger allotment or community garden.
Small Home Gardens
For small spaces, rows might be just a few feet long. You can easily create these with a hand trowel or hoe. Consider slightly wider spacing if you want more accessible pathways.
Allotments and Larger Plots
Larger areas benefit greatly from a well-planned garden layout with consistent row spacing. If you have access to a rototiller, garden tilling becomes a more practical option for initial soil preparation. Measuring and marking rows with string is highly recommended for consistency.
Container Gardening and Raised Garden Beds
While you don’t typically make long rows in individual containers, the concept of organized planting can still apply. Within larger raised garden beds, you can still create shorter, well-defined rows for efficient planting and access. This maintains the benefits of row gardening even in a more contained environment.
Frequently Asked Questions (FAQ)
What is the best spacing for garden rows?
The best spacing for garden rows depends on the plants you are growing. Always consult your seed packets or plant tags for specific recommendations on planting spacing. Generally, for most vegetables, rows are spaced 18-36 inches apart to allow for comfortable access and growth.
Should garden rows run north-south or east-west?
Most gardeners recommend running rows north-south. This orientation allows plants to receive even sunlight throughout the day, preventing taller plants from shading shorter ones.
How deep should a garden row furrow be?
The depth of a garden row furrow depends on the size of the seed. Smaller seeds like lettuce or carrots need shallow furrows (about 1/4 to 1/2 inch deep), while larger seeds like beans or corn need deeper furrows (1 to 2 inches deep). Check your seed packet for precise depth.
Can I make rows without tilling?
Yes, you can make rows without traditional garden tilling, especially if your soil is already relatively loose. You can use a broadfork to loosen the soil or create no-till rows by simply drawing soil from the pathways to form the planting mounds or furrows. This is often called “broadforking” or “minimal tillage.”
What if I have clay soil? How does that affect making rows?
Clay soil can be more challenging as it compacts easily. Preparing garden soil with plenty of compost is crucial. When making rows, be gentle. Instead of deep garden tilling that might break up large clods, consider broadforking or simply drawing soil from the pathways to create the rows, creating slightly raised planting areas. This improves drainage and aeration.
How do I manage weeds in my garden rows?
Weeding is a key part of row gardening. Regularly hoeing between the rows to remove young weeds is very effective. Mulching around your plants also helps suppress weed growth. Hand-pulling any weeds that do appear is also important.
Is row gardening suitable for all types of gardens?
Row gardening is a versatile method suitable for most garden types, from small backyard plots to larger allotments. It’s particularly useful for growing vegetables in quantity. For very small or uniquely shaped spaces, or for certain types of plants (like dense bush herbs), other garden layout strategies might be more efficient, but the core principles of organization and access remain valuable.
Making rows in your garden is a fundamental gardening skill that brings order and efficiency to your planting efforts. By following these simple steps, you can create a well-organized garden that’s easier to manage, leading to healthier plants and a more abundant harvest. Happy gardening!