
What are the best worms for my garden? The best worms for your garden are composting worms, particularly composting red wigglers (Eisenia fetida). These worms are highly efficient at breaking down organic matter and are readily available.
Getting worms for your garden is an exciting step towards more sustainable and productive gardening. Whether you’re looking to create nutrient-rich compost through vermicomposting or improve your soil’s structure, understanding where and how to obtain these beneficial creatures is key. This guide will walk you through everything you need to know, from identifying the best types of worms to setting up their home and keeping them happy.
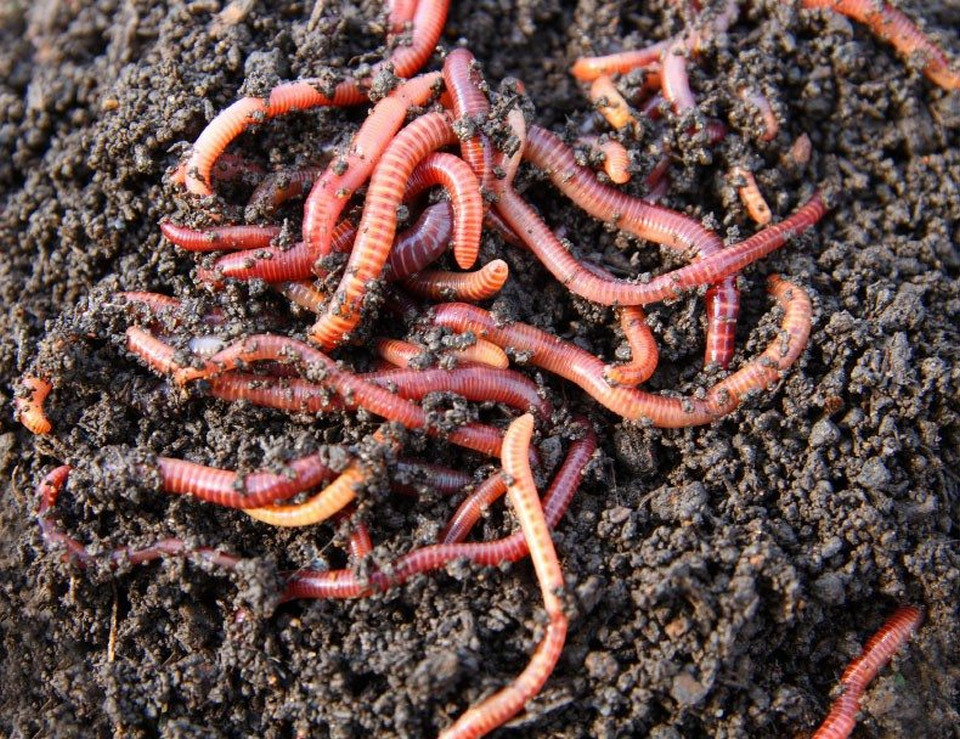
Image Source: seedmoney.org
Why Worms are Garden Superheroes
Before we dive into acquiring them, let’s quickly celebrate why worms are so vital for a healthy garden.
Soil Improvement
Worms are nature’s tillers. As they move through the soil, they create tunnels that:
- Improve aeration: This allows oxygen to reach plant roots, promoting healthy growth.
- Enhance drainage: Worm tunnels prevent waterlogging, which can suffocate roots.
- Increase water retention: While improving drainage, their tunnels also help retain moisture closer to plant roots.
Nutrient Cycling
The magic of worms truly shines in their digestive process. They consume organic waste and excrete nutrient-rich material known as earthworm castings. These castings are a powerhouse of plant-available nutrients, including nitrogen, phosphorus, and potassium. They also contain beneficial microbes that further enrich the soil and boost plant health.
Pest Control (Indirectly)
Healthy soil, enriched by worm activity, leads to healthier plants. Healthier plants are generally more resistant to pests and diseases. So, while worms don’t eat pests directly, they create an environment where your plants can thrive and defend themselves.
Identifying the Right Worms for the Job
Not all worms are created equal when it comes to gardening. The common earthworm you might find in your backyard, often called a nightcrawler or dew worm, prefers to live in deeper soil layers and is less suited for confined composting systems. For vermicomposting and enriching your garden soil, you need specific types of worms.
The Stars of the Show: Composting Worms
Composting worms are surface dwellers that thrive on decaying organic matter. They are prolific breeders and efficient decomposers. The most popular and effective species for home gardens are:
Red Wigglers (Eisenia fetida)
- Why they’re great: These are the champions of the composting world. Composting red wigglers are voracious eaters, reproduce quickly, and are hardy enough to thrive in a worm farm setup. They process food scraps and garden waste rapidly, producing high-quality earthworm castings.
- Where they live: They prefer the top layers of organic material.
- What they eat: Primarily decaying plant matter, food scraps (excluding citrus and spicy foods in large quantities), coffee grounds, tea bags, and shredded paper.
Other Composting Worms
While red wigglers are the top choice, other composting worms can also be effective:
- Eisenia hortensis (European Nightcrawler): Larger than red wigglers, they can also be used for composting and are sometimes used for fishing. They can tolerate a wider range of temperatures but may not process waste as quickly as red wigglers.
- Dendrobaena veneta: Similar to European nightcrawlers, these are also good composters and can tolerate cooler temperatures better than red wigglers.
What About Regular Earthworms?
While your garden soil undoubtedly benefits from the presence of native earthworms (often called anecic or endogeic worms depending on their burrowing habits), they are not typically the worms you’d purchase for a worm farm setup. These worms are adapted to live in established soil and may not survive or reproduce well in a confined composting environment. The goal of vermicomposting is to create concentrated worm castings that you can then add to your garden.
Where to Get Your Garden Worms
Now that you know the types of worms you need, let’s look at the best places to obtain them.
Buying Worms for Composting
The most reliable way to get the right type of worms is to purchase them from reputable suppliers. This ensures you get healthy, active composting worms, usually red wigglers.
Online Suppliers
- Specialty Worm Farms: Many businesses specialize in raising and selling composting worms. You can often find them through a quick online search. They typically offer various quantities, from a basic starter pack to larger amounts for bigger operations.
- E-commerce Platforms: Websites like Amazon and eBay also list sellers of composting worms. It’s advisable to check seller reviews and ratings to ensure you’re buying from a trustworthy source.
- Gardening Supply Websites: Some larger online gardening retailers also carry composting worms.
Local Sources
- Local Worm Farms: If you’re lucky, there might be a worm farm in your area. This is a great way to support local businesses and potentially see the operation firsthand.
- Gardening Clubs and Composting Groups: Connect with local gardening enthusiasts. They might be willing to share or sell you some of their worms, especially if they have a thriving vermicomposting system.
- Farmers Markets: Occasionally, vendors at farmers’ markets who are also vermicomposters will sell worms.
How to Attract Earthworms to Your Garden
While buying worms is best for initiating a worm farm setup, you can also encourage existing earthworm populations in your garden soil to flourish naturally. This is a long-term strategy for soil health.
- Enrich the Soil: Add plenty of organic matter to your garden beds. This includes compost, well-rotted manure, and shredded leaves. Worms are attracted to food sources.
- Maintain Soil Moisture: Keep your soil consistently moist, but not waterlogged. Worms breathe through their skin and need moisture to survive.
- Avoid Soil Disturbance: Minimize tilling or excessive digging. Worms prefer undisturbed soil where they can create their burrows and habitats.
- Reduce Chemical Use: Pesticides and herbicides can harm earthworm populations. Opt for organic pest control methods.
- Provide Shelter: Mulching your garden beds with organic material provides shelter and a food source for worms.
Setting Up Your Worm Farm
Once you have your composting red wigglers, you need to provide them with a suitable home. A worm farm setup is often called a worm bin.
Types of Worm Bins
There are several popular types of worm bins:
Plastic Tote Bins
- Description: These are readily available, inexpensive plastic storage totes with lids. They are easy to modify for vermicomposting.
- Pros: Affordable, easy to find, lightweight.
- Cons: Can be less breathable than other options, may overheat in direct sun if not managed carefully.
Wooden Bins
- Description: Can be DIY projects or purchased pre-made. Wood provides good insulation.
- Pros: Natural material, good insulation, aesthetically pleasing if built well.
- Cons: Can be heavier, may require more maintenance to prevent rotting.
Stackable Worm Farms
- Description: These systems consist of multiple trays that stack on top of each other. As the worms process the waste, they move up into the next tray, leaving behind finished earthworm castings.
- Pros: Efficient for harvesting castings, often designed for good airflow.
- Cons: Can be more expensive than DIY bins.
Essential Components of a Worm Bin
Regardless of the type of bin you choose, it needs a few key elements:
- A Container: This is your worm bin. It should be opaque (worms don’t like light) and have a lid to retain moisture and keep pests out.
- Ventilation: Worms need to breathe. Drill or poke several small holes in the sides and lid of your bin to allow for airflow. Avoid making holes too large, as this can lead to drying out or escapees.
- Drainage: Worm bins can become too wet, leading to anaerobic conditions and potential harm to your worms. Drill a few small holes in the bottom of the bin for excess liquid to drain. You can place a tray underneath to collect this “worm tea,” which is a potent liquid fertilizer.
- Bedding: This is the material your worms will live in and process. It needs to be moist, airy, and provide a carbon source.
Ideal Bedding Materials
Good bedding is crucial for a healthy worm bin. It should mimic the moist, organic environment worms thrive in.
- Shredded Newspaper: Black and white newspaper (avoid glossy ads) is an excellent base. Shred it into thin strips.
- Shredded Cardboard: Similar to newspaper, plain brown cardboard works well.
- Coconut Coir: This is a popular choice as it holds moisture well and is pH neutral.
- Peat Moss: Another good moisture-retaining option.
- Aged Leaves: Dry, shredded leaves can be added to the bedding mix.
Important: Always moisten your bedding material before adding it to the bin. It should feel like a wrung-out sponge – damp but not dripping.
Preparing Your Worm Bin
- Drill Holes: If using a plastic tote, drill ventilation holes on the sides and lid, and a few drainage holes in the bottom.
- Add Bedding: Fill the bin about one-third to one-half full with your chosen bedding materials. Moisten the bedding thoroughly and mix it well.
- Introduce Worms: Once your bedding is prepared and the bin is ready, gently place your composting red wigglers on top of the bedding. They will naturally burrow down into it. Leave the lid off for the first hour or so to allow them to acclimate.
- Add Initial Food: You can add a small amount of worm food (like kitchen scraps) after a day or two. Bury it slightly under the bedding to avoid attracting pests.
Feeding Your Worms
Worm food is what fuels your vermicomposting system and produces those valuable earthworm castings.
What Worms Love to Eat
Composting red wigglers are generally happy with a variety of organic materials. A good rule of thumb is to feed them what you would compost.
- Vegetable Scraps: Fruit and vegetable peels, cores, and trimmings.
- Coffee Grounds and Filters: Worms love coffee grounds!
- Tea Bags: Remove any staples and plastic tags.
- Crushed Eggshells: Wash them and crush them finely. They provide grit for the worms’ gizzards and add calcium.
- Cooked Pasta and Rice (in moderation): Ensure it’s plain and not too greasy.
- Bread (in moderation): Stale bread is fine.
- Shredded Paper and Cardboard: Can be used as both bedding and food.
What to Avoid Feeding Your Worms
Some foods can be harmful or unappealing to worms.
- Citrus Fruits: Oranges, lemons, grapefruits – their acidity can be too much.
- Spicy Foods: Peppers, hot sauces.
- Onions and Garlic: In large quantities, they can be problematic.
- Meat and Dairy Products: These can attract pests and create foul odors, and they decompose too slowly for efficient vermicomposting.
- Oily or Greasy Foods: Can clog the system and attract pests.
- Processed Foods: Generally not recommended.
- Pet Waste: Except for herbivore manure (e.g., rabbit or hamster), avoid dog and cat feces due to potential pathogens.
Feeding Frequency and Amount
- Start Slow: Begin by adding a small amount of food. Observe how quickly the worms consume it.
- Bury the Food: Always bury food scraps under the bedding. This helps prevent odors and pests.
- Rotate Feeding Spots: Don’t feed in the same spot every time. Bury new food in a different area of the bin.
- Don’t Overfeed: Overfeeding can lead to anaerobic conditions, foul smells, and a buildup of waste that the worms can’t process. It’s better to underfeed than overfeed. A general guideline is that worms can eat about half their weight in food per day, but start with less.
Worm Bin Maintenance
Consistent worm bin maintenance is key to a successful vermicomposting operation.
Moisture Levels
- Check Regularly: The bedding should consistently feel like a damp sponge.
- Too Dry: If the bedding feels dry, add a little water. You can do this by lightly spraying the surface or adding a small amount of water to the bedding.
- Too Wet: If the bin is too wet, add more dry bedding material (shredded newspaper or cardboard). Ensure drainage holes are clear.
Temperature Control
- Ideal Range: Composting worms, especially red wigglers, prefer temperatures between 55°F and 77°F (13°C and 25°C).
- Too Hot: If your bin is in direct sunlight or a hot room, it can overheat. Move it to a cooler location, or add frozen water bottles to the bin temporarily.
- Too Cold: In colder weather, insulate your bin with blankets or move it to a more temperate area, like a garage or shed.
Aeration
- Fluffing the Bedding: Periodically gently fluff the top layers of bedding with a hand fork or trowel. This helps maintain aeration and prevents compaction.
Harvesting Castings
This is the rewarding part! As worms process food and bedding, they create earthworm castings.
- When to Harvest: You can usually harvest castings every 3-6 months, depending on the size of your bin and the worm population. You’ll know it’s time when the bin is mostly filled with dark, granular material, and you see fewer food scraps.
- Methods:
- Migration Method: Stop feeding one side of the bin for a few weeks. The worms will migrate to the other side where fresh food is available. You can then harvest the castings from the side they’ve vacated.
- Light Method: Dump the contents of the bin onto a tarp or plastic sheet under bright light. The worms will burrow away from the light. You can then scrape off the top layer of castings, and repeat the process until you are left with mostly worms.
- Screening: Use a coarse sieve or screen to separate worms and larger organic matter from the finished castings.
Using Your Earthworm Castings
The rich earthworm castings you harvest are pure gardening gold.
How to Use Castings
- Soil Amendment: Mix castings directly into your garden soil, potting mixes, or seed-starting mixes. A common ratio is 1 part castings to 10 parts soil.
- Top Dressing: Sprinkle a layer of castings around the base of established plants. The nutrients will be slowly released as you water.
- Worm Tea: You can steep castings in water (often with an aeration pump) to create “worm tea,” a liquid fertilizer that can be sprayed on leaves or used to water plants.
Troubleshooting Common Worm Bin Issues
Even with the best intentions, you might encounter a few hiccups.
Odors
- Cause: Usually due to overfeeding, anaerobic conditions (too wet, not enough air), or improper food items.
- Solution: Stop feeding for a week. Add more dry bedding material to absorb moisture and improve aeration. Check that drainage holes are not blocked. Ensure you’re not feeding meat, dairy, or excessive citrus.
Worms Trying to Escape
- Cause: The environment is likely too wet, too dry, too acidic/alkaline, or there’s not enough food.
- Solution: Check moisture levels and adjust. Ensure proper ventilation. Bury food scraps and avoid overfeeding. Add more appropriate bedding.
Pests (Fruit Flies, Mites)
- Cause: Exposed food scraps are the primary attractant.
- Solution: Always bury food scraps beneath the bedding. Avoid overfeeding. If fruit flies are an issue, you can try placing a small dish of apple cider vinegar near the bin to attract and trap them. For mites, ensuring proper moisture and aeration usually helps.
Frequently Asked Questions (FAQ)
Q: How many worms do I need to start vermicomposting?
A: A starter pack of 0.5 to 1 pound (about 500-1000 worms) is usually sufficient for a small to medium-sized bin.
Q: Can I just put worms in my garden soil directly?
A: While native earthworms are beneficial, the composting worms you buy (like red wigglers) are best suited for confined systems like worm bins or for specific applications like creating worm compost piles. They are not typically meant to be released directly into established garden beds without a controlled environment.
Q: How long does it take to get usable castings?
A: It typically takes 3-6 months to harvest your first batch of castings, depending on the bin size, worm population, and feeding habits.
Q: My worms seem to be dying, what could be wrong?
A: This is often due to extreme temperatures (too hot or too cold), excessive moisture leading to drowning or anaerobic conditions, or incorrect food types causing stress. Review your bin’s environment and feeding practices.
Q: Can I use my backyard compost for bedding?
A: Yes, but ensure it’s fully composted and free of any potentially harmful chemicals. Aged manure or partially finished compost can be excellent additions to worm bedding.
By following this comprehensive guide, you’ll be well on your way to acquiring the right worms and harnessing their incredible power to transform your garden. Happy vermicomposting!