
Dead spots in your lawn can be frustrating, turning a vibrant green carpet into patchy, unsightly areas. What causes dead spots in a lawn? The most common culprits include poor soil health, insect infestations, diseases, improper watering, and excessive foot traffic. Can I fix dead spots in my lawn myself? Yes, with the right knowledge and approach, you can effectively revive those barren patches and achieve a lush, healthy lawn.
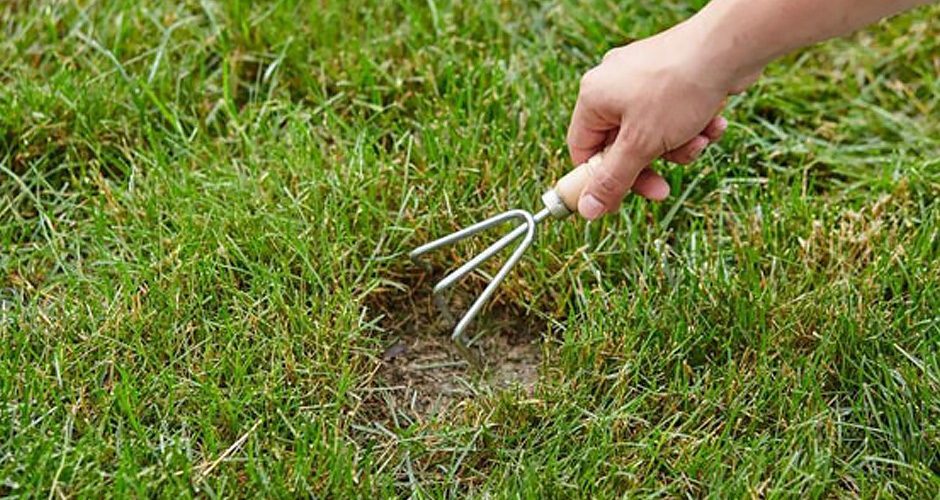
Image Source: contentgrid.homedepot-static.com
Diagnosing the Cause of Your Lawn’s Dead Spots
Before you can effectively fix dead spots, you need to figure out why they’re happening. Several factors can contribute to these unwelcome barren areas.
Soil Issues: The Foundation of a Healthy Lawn
Your soil is the bedrock of your lawn’s health. If the soil is compacted, lacks nutrients, or has the wrong pH, your grass simply won’t thrive.
Soil Compaction: A Common Culprit
When soil becomes too dense, it restricts the flow of air, water, and nutrients to the grass roots. This is often caused by heavy foot traffic, especially on wet soil.
- Symptoms: Grass may appear thin, yellow, or simply stop growing in compacted areas. You might notice water pooling on the surface after rain.
- Solutions:
- Lawn Aeration: This is a crucial step. Lawn aeration involves removing small plugs of soil from your lawn. This opens up the soil, allowing air, water, and nutrients to penetrate more easily. You can rent an aerator or hire a professional. It’s best done when your grass is actively growing. For cool-season grasses, spring or fall is ideal. For warm-season grasses, late spring or early summer works well.
- Reduce Foot Traffic: Minimize walking or playing on the lawn, especially when it’s wet.
Nutrient Deficiencies: Feeding Your Grass
Just like any living thing, grass needs the right nutrients to grow strong and green. A lack of essential nutrients can lead to weak growth and dead patches.
- Symptoms: Yellowing grass, slow growth, and increased susceptibility to diseases and pests.
- Solutions:
- Soil Testing for Lawn: The best way to know what nutrients your lawn is missing is to perform a soil testing for lawn. You can purchase a DIY kit or send a sample to your local extension office. This test will tell you the pH of your soil and the levels of key nutrients like nitrogen, phosphorus, and potassium.
- Fertilization: Based on your soil test results, apply a balanced fertilizer. A common recommendation for general lawn health is a fertilizer with a high nitrogen fertilizer lawn component, as nitrogen promotes green, leafy growth. Follow the application rates on the fertilizer bag carefully, as over-fertilizing can also damage your lawn.
pH Imbalance: Too Acidic or Too Alkaline
Soil pH affects how well grass can absorb nutrients. Most lawn grasses prefer a slightly acidic to neutral pH (between 6.0 and 7.0).
- Symptoms: Yellowing or stunted growth, even with proper fertilization.
- Solutions:
- Adjusting pH: If your soil is too acidic, you’ll need to add lime. If it’s too alkaline, you’ll add sulfur. Your soil test will provide specific recommendations for the amount of lime or sulfur needed. Apply these amendments according to instructions and water them in.
Pest Infestations: The Unseen Enemy
Insects can wreak havoc on your lawn, creating dead or damaged patches.
Grubs: A Common Underground Threat
Grub worms are the C-shaped larvae of various beetles. They feed on grass roots, starving the grass of water and nutrients.
- Symptoms: Irregular brown patches that may feel spongy and lift up easily like a carpet. You might see increased bird or animal activity in the lawn, as they dig for grubs. A key indicator is grub treatment for lawn effectiveness; if you see these symptoms, grubs are a prime suspect.
- Solutions:
- Identification: Dig up a few small sections of the affected turf. If you find white, C-shaped grubs, you have a grub problem.
- Treatment: Apply an appropriate grub killer when grubs are actively feeding, typically in late summer or early fall, or when newly hatched larvae are present. Always follow product instructions carefully. You can also use beneficial nematodes as a more eco-friendly option.
Chinch Bugs: Tiny Terrors
Chinch bugs are small insects that feed on grass blades, injecting a toxin that causes yellowing and eventually death.
- Symptoms: Yellow or brown patches, often appearing in sunny areas and spreading outwards. The grass in the patches may look drought-stressed, even when watered.
- Solutions:
- Identification: Part the grass in a suspected area. You’ll often see chinch bugs congregate at the edge of the dead or dying patch.
- Treatment: Insecticides are effective against chinch bugs. Apply them during the heat of the day when the bugs are most active.
Lawn Diseases: Fungal and Bacterial Problems
Diseases can quickly turn a healthy lawn into a mess of dead or discolored patches.
Fungal Diseases: The Most Prevalent
Many lawn diseases are caused by fungi, often thriving in specific weather conditions.
- Symptoms: Vary widely depending on the disease, but can include spots, rings, blighting, or wilting of grass blades. Examples include brown patch, dollar spot, and powdery mildew. Accurate lawn disease identification is key.
- Solutions:
- Identification: Carefully examine the affected grass blades and patterns of the dead spots. Online resources or local extension offices can help with lawn disease identification.
- Cultural Practices: Proper watering, good air circulation (through aeration), and avoiding excessive nitrogen can help prevent many fungal diseases.
- Fungicide Application Lawn: If a fungal disease is confirmed, a fungicide application lawn may be necessary. Choose a fungicide specifically formulated for the diagnosed disease and apply it according to label directions. It’s often best to apply fungicides preventatively or at the first sign of disease.
Environmental Stress: Nature’s Toll
Sometimes, external factors beyond your immediate control can lead to lawn damage.
Drought and Heat Stress: Thirsty Grass
Periods of hot, dry weather can cause grass to go dormant or die.
- Symptoms: Grass turns brown and appears dry, but the blades might still be pliable.
- Solutions:
- Lawn Watering Techniques: Deep and infrequent watering is crucial. Water your lawn early in the morning to minimize evaporation. Aim to water deeply enough to moisten the soil 4-6 inches down. Proper lawn watering techniques encourage deeper root growth, making the grass more resilient to drought.
- Mowing Practices: Mow at a higher setting during hot weather. Taller grass shades the soil, keeping it cooler and retaining moisture.
Excessive Thatch: A Smothering Layer
Thatch is a layer of dead and living grass stems, roots, and crowns that accumulates between the green blades and the soil surface. A thin layer is normal, but excessive thatch can suffocate your lawn.
- Symptoms: The lawn may feel spongy, and watering and fertilization may not penetrate effectively. It can also harbor pests and diseases.
- Solutions:
- Thatch Removal Lawn: If the thatch layer is more than half an inch thick, it’s time for thatch removal lawn services. This can be done with a power rake or dethatcher. It’s best performed when the grass is actively growing, usually in spring or fall. After dethatching, it’s a good time to consider overseeding bare spots.
Pet Urine: Accidental Fertilization
While nitrogen fertilizer is good for lawns, too much in one spot from pet urine can burn the grass.
- Symptoms: Small, distinct brown or dead spots, often with a ring of greener grass around them.
- Solutions:
- Watering: Immediately water down the spot after a pet urinates on it to dilute the urine.
- Training: Train your pet to use a designated area of the yard.
- Repair: For existing spots, you’ll likely need to repair them by reseeding.
Chemical Spills: Accidental Damage
Accidental spills of gasoline, oil, or harsh chemicals can kill grass instantly.
- Symptoms: Dead, often discolored patches where the spill occurred.
- Solutions:
- Clean Up: Try to remove any remaining chemical if safe to do so.
- Repair: You will need to remove the dead grass and soil and reseed or patch the area.
Fixing Dead Spots: A Step-by-Step Approach
Once you’ve identified the cause of your dead spots, you can implement the correct solutions. Often, a combination of methods is required.
Step 1: Prepare the Area
Before you can introduce new grass, you need to prepare the dead spot.
Remove Dead Grass and Debris
- Use a rake or a stiff brush to remove all the dead grass, weeds, and any other debris from the bare patch.
- If the soil is compacted in that area, loosen it with a garden fork or trowel.
Step 2: Amend the Soil
Healthy soil is essential for new grass to establish.
Improve Soil Quality
- Add Topsoil: For larger bare patches or if the soil is poor, add a layer of good quality topsoil. Mix it lightly into the existing soil.
- Add Compost: Mixing in some compost will improve soil structure, drainage, and fertility. This is especially beneficial if your soil testing for lawn indicated low organic matter or nutrient deficiencies.
Step 3: Introduce New Grass
This is where you’ll bring your lawn back to life.
Overseeding Bare Spots: Bringing Back the Green
Overseeding bare spots is the process of planting grass seed in existing lawns.
- Choose the Right Seed: Select a grass seed mix that matches your existing lawn type and climate. Consider a mix that is drought-tolerant or disease-resistant if those have been issues.
- Sowing the Seed:
- For small patches: Sprinkle the seed evenly over the prepared soil.
- For larger areas: Use a spreader for more even distribution.
- Covering the Seed: Lightly rake the seed into the soil. You want good seed-to-soil contact. A layer of about 1/8 to 1/4 inch of soil or compost over the seed is ideal.
- Keep it Moist: This is critical for germination. Water gently twice a day, or as needed, to keep the soil surface consistently moist but not waterlogged.
Step 4: Nurturing the New Growth
Once the seeds have sprouted, you need to care for the new grass.
Watering New Seed
- Continue to water gently and regularly until the new grass is well-established (about 4-6 inches tall).
- Gradually reduce the watering frequency, allowing the soil to dry slightly between waterings, to encourage deeper root growth.
Mowing New Grass
- Wait until the new grass reaches about 3-4 inches in height before mowing.
- When you mow, use a sharp mower blade and remove no more than one-third of the grass blade height at a time. This helps prevent stressing the young grass.
Fertilizing New Grass
- A light application of a starter fertilizer (low in nitrogen, higher in phosphorus) can help the new grass establish strong roots. Apply it according to package directions, usually a few weeks after germination.
Preventing Future Dead Spots: Proactive Lawn Care
The best way to deal with dead spots is to prevent them from occurring in the first place. Consistent, proper lawn care is key.
Regular Aeration
Performing lawn aeration once a year, especially in high-traffic areas, helps prevent soil compaction and improves overall turf health.
Proper Watering Schedule
Adhere to good lawn watering techniques. Water deeply and infrequently, ideally in the early morning. This encourages strong, deep root systems that are more resistant to drought and disease.
Smart Fertilization
Use nitrogen fertilizer lawn applications strategically, based on soil testing for lawn results. Avoid over-fertilizing, which can burn the grass and create weak growth. Follow recommended application rates and timing for your grass type.
Effective Weed Control
Weeds compete with grass for water, nutrients, and sunlight. Addressing weed control bare patches is important.
- Healthy Turf: A thick, healthy lawn is the best defense against weeds.
- Manual Removal: For isolated weeds in bare patches, pull them by hand, ensuring you remove the entire root system.
- Herbicides: If weeds are widespread, use a pre-emergent herbicide in the spring to prevent weed seeds from germinating. Post-emergent herbicides can be used to kill existing weeds, but be careful to choose one that won’t harm your desired grass species, especially when overseeding bare spots.
Monitoring for Pests and Diseases
Regularly inspect your lawn for signs of pests or diseases. Early detection and treatment are crucial. If you suspect a problem, consult resources for lawn disease identification or pest identification. Prompt fungicide application lawn treatments can save your lawn from extensive damage.
Managing Thatch
Perform thatch removal lawn services as needed to keep the thatch layer from becoming too thick.
Summary Table: Common Dead Spot Causes and Solutions
| Cause of Dead Spot | Symptoms | Solution |
|---|---|---|
| Soil Compaction | Thin grass, water pooling, compacted soil. | Lawn aeration, reduce foot traffic. |
| Nutrient Deficiency | Yellowing, slow growth, poor color. | Soil testing for lawn, fertilization with appropriate nitrogen fertilizer lawn. |
| Pest Infestation (Grubs) | Spongy patches, grass lifts easily, visible C-shaped grubs. | Grub treatment for lawn, apply insecticides or beneficial nematodes. |
| Pest Infestation (Chinch Bugs) | Drought-like patches in sunny areas. | Identify chinch bugs, apply appropriate insecticides. |
| Fungal Diseases | Spots, rings, wilting, blighting on grass blades. | Lawn disease identification, fungicide application lawn, improve air circulation and watering. |
| Drought/Heat Stress | Brown, dry-looking grass that is still pliable. | Implement proper lawn watering techniques, mow higher during hot weather. |
| Excessive Thatch | Spongy feel, poor water penetration. | Thatch removal lawn, dethatch the lawn. |
| Pet Urine | Small, distinct brown spots with greener rings. | Water down urine spots immediately, train pets to a specific area. |
Frequently Asked Questions (FAQ)
Q1: How long does it take to fix dead spots in my lawn?
The time it takes to fix dead spots depends on the cause and the method used. Simple repairs like reseeding might show results in a few weeks, while addressing severe soil compaction or disease could take a full growing season or longer.
Q2: When is the best time to overseed my lawn?
The best time to overseed depends on your grass type. For cool-season grasses (like fescue, bluegrass, and ryegrass), fall is generally the ideal time. Spring is also a good option. For warm-season grasses (like Bermuda, Zoysia, and St. Augustine), late spring or early summer is best.
Q3: Can I just spread grass seed over the dead spot without preparing the soil?
While you might see some germination, the results will be poor. Proper soil preparation, including loosening compacted soil, amending with topsoil or compost, and ensuring good seed-to-soil contact, is crucial for successful overseeding bare spots.
Q4: How often should I aerate my lawn?
For most lawns, aerating once a year is sufficient. If your soil is heavily compacted due to high traffic, you might consider aerating twice a year, typically in spring and fall.
Q5: What if I can’t identify the cause of my dead spots?
If you’ve tried diagnosing the problem and are still unsure, it’s best to consult a local lawn care professional or your county extension office. They can help with lawn disease identification, pest analysis, and soil testing for lawn interpretation.
By following these expert tips, you can effectively tackle those frustrating dead spots and cultivate a healthy, vibrant lawn that you can be proud of. Remember, consistent care and a keen eye for potential problems are your best allies in maintaining a beautiful yard.